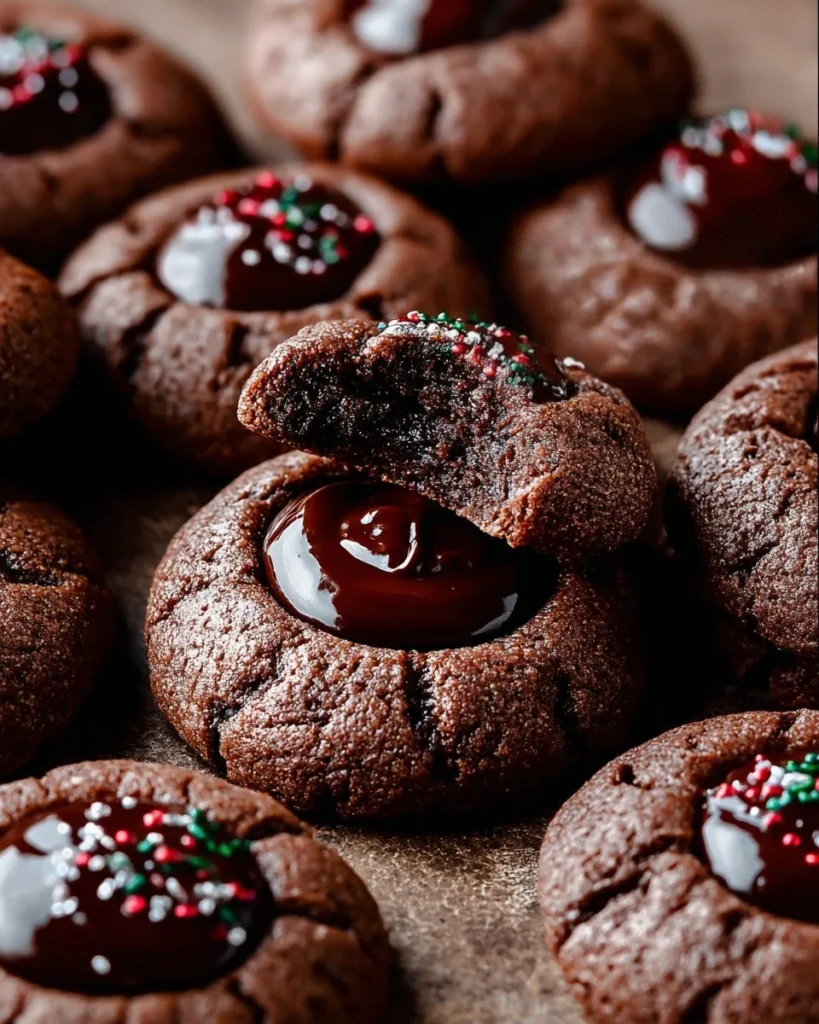
Chocolate Thumbprint Cookies
What can I say—chocolate and dessert have always been my love language. There’s something so nostalgic about the aroma of baking cookies wafting through the house, isn’t there? You know those rainy afternoons when you’ve got nothing better to do than putter around the kitchen? That’s when these Chocolate Thumbprint Cookies come to mind! My grandma used to make a variation of these, and no matter how many times I baked them, they never quite hit the same as hers. That’s the magic of baking—a recipe can take you down memory lane faster than a time machine! So, I’ve made it my life’s mission to perfect this treat, and I’m ready to spill my secrets.
Why you’ll love this recipe
Let’s talk about why you absolutely NEED to whip these up today. First off, they’re pure indulgence. Picture this: a warm, soft cookie with a delicate chocolate ganache middle that melts in your mouth. It’s like a hug for your taste buds! Plus, they’re incredibly easy to make, and if you’ve got kids or a friend who needs lifting, what better way to spread joy?
And let’s not forget about versatility. These cookies can be dressed up or down without losing their charm. If you fancy a bit of spice or add in some nuts, the sky’s the limit! Beyond their deliciousness, you’ll impress your family or any guest when they see how simple yet elegant they are. Believe me, the compliments will flow like warm chocolate ganache!
Gather these ingredients
Let’s gather what we need! Each ingredient has its own role to play, so let’s shine a light on them:
-
1 cup unsalted butter, softened
This is your base. Softening the butter is crucial—it helps create that desirable fluffiness. If you’re in a pinch, room temperature margarine works as a substitute. -
1 cup granulated sugar
Sweetness alert! This sugar keeps the cookies crisp on the outside while soft inside, balancing that chewy texture perfectly. -
1 cup brown sugar, packed
Ah, the rich molasses flavor! The brown sugar gives a depth that white sugar just can’t match. If you’re out, you can use more granulated sugar, but the flavor won’t be quite the same. -
2 large eggs
Eggs add moisture, richness, and soul to the mix. Room temperature eggs blend in better, so if you forget to set them out, immerse them in warm water for a few minutes. -
2 teaspoons vanilla extract
This is the essence of comfort! Vanilla elevates everything to new heights. Try using pure vanilla for richer flavor, but imitation will do in a pinch. -
2 cups all-purpose flour
The backbone of your cookie. All-purpose works beautifully here, though a gluten-free blend can also bring the magic if you’re avoiding gluten. -
1 cup unsweetened cocoa powder
The star of the show! Cocoa powder gives that luxurious chocolate flavor. There are different types (dutch-processed for sweeter or natural for more intensity), so choose based on your preference. -
1 teaspoon baking powder
It’s the leavening agent that gives rise to your cookies! Don’t let it sit in your pantry too long; baking powder has an expiration date! -
1/2 teaspoon salt
Salt is the unsung hero in desserts. It balances sweetness and enhances flavors. Trust me, don’t skip it! -
1 cup chocolate ganache (for filling)
Your luxurious inside! This is simply chocolate and cream melted together, and you can use dark, milk, or even white chocolate depending on your craving.
Preparing Chocolate Thumbprint Cookies
Now, let’s get to it! Here’s how you can bring these delightful cookies to life—you’ll be a pro in no time!
- Preheat your oven to 350°F (175°C).
- In a large bowl, cream together the softened butter, granulated sugar, and brown sugar until smooth. Use an electric mixer if you have one; it’ll save time and give you that airy texture.
- Next, beat in the eggs one at a time, mixing well after each addition, then stir in that glorious vanilla extract. It’s starting to smell heavenly already!
- In a separate bowl, combine the flour, cocoa powder, baking powder, and salt; then, gradually stir this dry mixture into the creamy goodness. You want it mixed but don’t overdo it—there’s no love in tough cookies!
- Roll the dough into 1-inch balls. I like using a cookie scoop for this—uniform cookies are visually appealing! Place them on a baking sheet lined with parchment paper.
- Press your thumb into the center of each cookie to create a little well. Don’t be shy; you want it deep enough for the ganache!
- Bake for 10-12 minutes, keeping an eye on them. They’re ready when they seem slightly set but still soft!
- When they’re out, let them cool on wire racks. Patience is a virtue; they’ll be magical once they cool!
- Fill the thumbprint with chocolate ganache—ladle it in like you’re my best bartender!
- Last but not least, let the ganache set before serving.
Best way to enjoy it
When these beauties are ready, it’s time to dive in! Serve them fresh out of the oven with a hot cup of coffee or a glass of milk. If you’re feeling fancy, a scoop of vanilla ice cream on the side takes it to another level. Oh, and don’t underestimate the appeal of a sweet wine or dessert liqueur pairing. Each cheery bite with melting ganache will have you raving!
How to store and freeze
Leftovers? What’s that? Seriously though, if you happen to have some cookies that need saving, here’s how you keep them fresh:
- Room temperature: Store in an airtight container for about 5 days—though I doubt they’ll last that long!
- Freezing: Place cookies in a freezer-safe container or ziplock bag. They can last about 3 months. Just thaw them at room temperature before serving, and if you want a warm treat, pop them in the microwave for a few seconds!
Tips for a successful recipe
- Tip 1: Use room temperature ingredients for a smoother dough. Cold butter is the enemy of creamy!
- Tip 2: If you’re short on time, you can chill the dough for 30 minutes; it helps blend the flavors and keep cookies from spreading too much when baking.
- Tip 3: Feeling adventurous? Try adding chopped nuts, or different flavored extracts. Almond or peppermint could take it to a whole new level!
- Tip 4: Watch your bake time. Every oven is different—don’t let them go from perfectly soft to overbaked in a blink.
Creative Twists
Why stop here? You can play around with the flavors! Here are some fun ideas:
- Swap the chocolate ganache for raspberry jam for a tangy twist that pairs blissfully with chocolate.
- Add a pinch of espresso powder to the dough for a mocha-magic experience.
- Sprinkle some flaky sea salt on top of the ganache for a salty-sweet masterpiece.
- For a seasonal treat, fold in some pumpkin spice for fall or some peppermint for the holidays!
Ingredients list
- 1 cup unsalted butter, softened
- 1 cup granulated sugar
- 1 cup brown sugar, packed
- 2 large eggs
- 2 teaspoons vanilla extract
- 2 cups all-purpose flour
- 1 cup unsweetened cocoa powder
- 1 teaspoon baking powder
- 1/2 teaspoon salt
- 1 cup chocolate ganache (for filling)
Directions to follow
- Preheat your oven to 350°F (175°C).
- In a large bowl, cream together the butter, granulated sugar, and brown sugar until smooth.
- Beat in the eggs one at a time, then stir in the vanilla.
- Combine the flour, cocoa powder, baking powder, and salt; gradually stir into the creamed mixture.
- Roll the dough into 1-inch balls and place them on a baking sheet.
- Press your thumb into the center of each cookie to create a small well.
- Bake for 10-12 minutes, removing them from the oven when slightly set.
- Allow cookies to cool completely on wire racks.
- Fill the thumbprint with chocolate ganache.
- Let ganache set before serving.
Your questions answered
Q: What’s the prep time for these cookies?
A: It typically takes about 20 minutes to prep the ingredients and mix the dough. Add another 10-12 minutes for baking.
Q: Can these cookies be made vegan?
A: Absolutely! Use coconut oil instead of butter and replace the eggs with a flaxseed or chia seed substitute.
Q: How can I make them gluten-free?
A: A 1:1 gluten-free flour mix works wonders here. Just make sure it contains xanthan gum for structure!
Q: Can I use something other than ganache?
A: Definitely! Jam, peanut butter, caramel—there’s room for creativity.
Q: How long do they last? Can I freeze them?
A: They last up to 5 days in an airtight container. Yes, you can freeze them for about 3 months!
These Chocolate Thumbprint Cookies are a treasure waiting to bring joy to your taste buds and smiles to your loved ones. So, what’s stopping you? Roll up your sleeves, ignite that oven, and let’s get to baking! Each cookie is not just a treat; it’s a memory, a moment, and a sprinkle of happiness that brings everyone together. Don’t forget to share your experience in the comments, and let’s keep the foodie conversation alive! 🍪❤️
Use Your Leftovers
Reduce food waste by making these recipes with your leftover ingredients:


Chocolate Thumbprint Cookies
Description
These Chocolate Thumbprint Cookies are a delightful blend of tender cookies filled with rich chocolate ganache, perfect for spreading joy and creating memories.Ingredients for Chocolate Thumbprint Cookies
Cookie Base
Instructions for Chocolate Thumbprint Cookies
-
Preheat Oven
Preheat your oven to 350°F (175°C). -
Cream Ingredients
In a large bowl, cream together the softened butter, granulated sugar, and brown sugar until smooth.Use an electric mixer for best results. -
Add Eggs and Vanilla
Beat in the eggs one at a time, then stir in the vanilla extract.Mixture will begin to smell wonderful! -
Combine Dry Ingredients
In a separate bowl, combine flour, cocoa powder, baking powder, and salt; gradually stir into the creamed mixture.Mix until just combined. -
Shape Cookies
Roll the dough into 1-inch balls and place them on a baking sheet lined with parchment paper.Use a cookie scoop for uniformity. -
Make Wells
Press your thumb into the center of each cookie to create a small well.Be generous with the depth. -
Bake Cookies
Bake for 10-12 minutes, until cookies are set but still soft.Keep an eye on them to avoid overbaking. -
Cool Cookies
Allow cookies to cool completely on wire racks.Patience is key for achieving the best flavor. -
Fill with Ganache
Fill the thumbprint with chocolate ganache and let it set before serving.Enjoy your freshly baked cookies!
Nutrition Facts
Servings 24
- Amount Per Serving
- Calories 120kcal
- % Daily Value *
- Total Fat 7g11%
- Saturated Fat 4g20%
- Trans Fat 0g
- Cholesterol 30mg10%
- Sodium 70mg3%
- Potassium 100mg3%
- Total Carbohydrate 15g5%
- Dietary Fiber 1g4%
- Sugars 10g
- Protein 2g4%
- Vitamin A 200 IU
- Vitamin C 0 mg
- Calcium 20 mg
- Iron 1 mg
- Vitamin D 0 IU
- Vitamin E 0 IU
- Vitamin K 0 mcg
- Thiamin 0 mg
- Riboflavin 0 mg
- Niacin 0 mg
- Vitamin B6 0 mg
- Folate 0 mcg
- Vitamin B12 0 mcg
- Biotin 0 mcg
- Pantothenic Acid 0 mg
- Phosphorus 10 mg
- Iodine 0 mcg
- Magnesium 0 mg
- Zinc 0 mg
- Selenium 0 mcg
- Copper 0 mg
- Manganese 0 mg
- Chromium 0 mcg
- Molybdenum 0 mcg
- Chloride 0 mg
* Percent Daily Values are based on a 2,000 calorie diet. Your daily value may be higher or lower depending on your calorie needs.