There’s something magical about using sourdough starter. You know, that bubbly, tangy mix that just sits in our kitchens, waiting for the next baking adventure? I’ve found solace in transforming my sourdough discard into delectable brownies that scream, “indulge me!” These Tasty Sourdough Discard Brownies are not just a way to use up what might otherwise go to waste; they turn a simple leftover into a rich, fudgy dessert that has become a beloved staple in my kitchen.
Why you’ll love this recipe
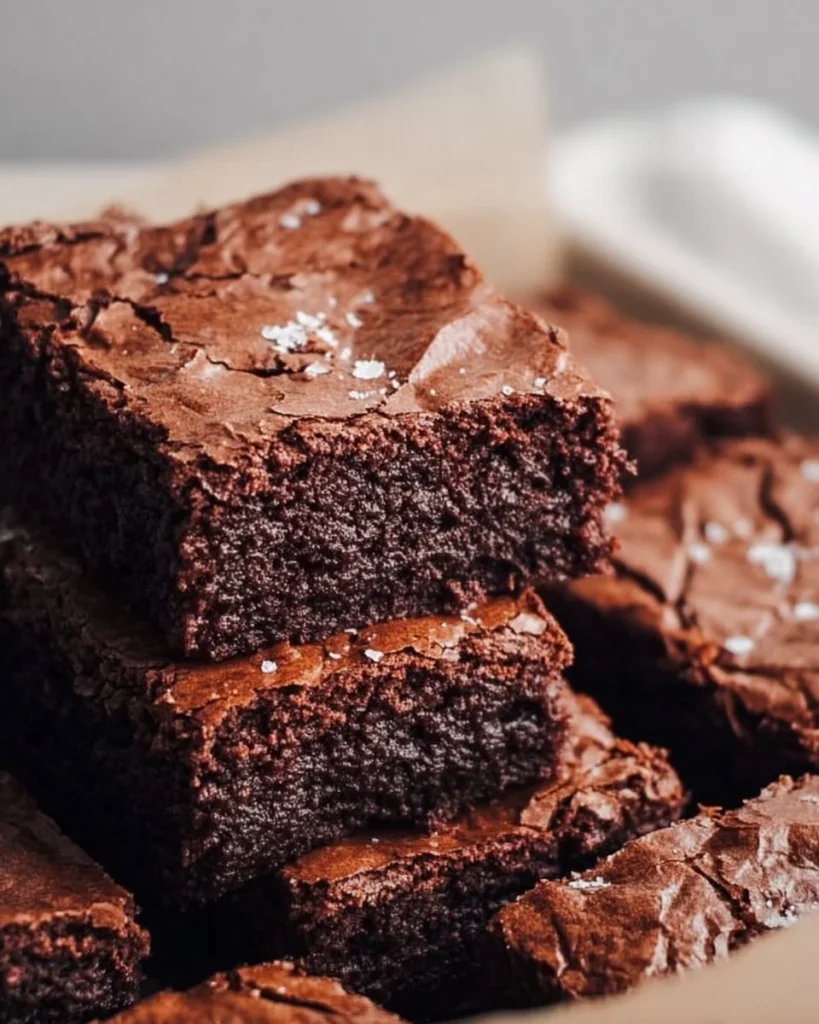
Imagine your typical brownie, but with an added depth that comes from that delightful tang of sourdough. Each bite is not only rich and chocolatey but also slightly chewy, embodying the rustic charm of homemade goodness. What’s more? You can whip these up in a heartbeat, even on the busiest of days. These brownies are perfect for when you’re craving a quick treat or when friends pop over unexpectedly.
The best part? Using sourdough starter means you’re cutting down on waste while still enjoying a treat that feels indulgent. It’s a win-win! Plus, with optional chocolate chips, you can customize it to your taste. Chocolate overload? Yes, please! So, why not make this batch tonight? Your taste buds will thank you, and you’ll have the perfect reason to share a little bit of happiness with loved ones.
Gather these ingredients
-
Sourdough Starter (1 cup): This is your secret weapon – the star of the show! Using sourdough discard not only reduces waste but adds a lovely, nuanced flavor to your brownies.
-
Sugar (1 cup): This is where the sweetness comes from. It caramelizes slightly during baking, adding a wonderful depth to the brownies. Plus, can we ever have enough sugar in a dessert?
-
Unsweetened Cocoa Powder (1/2 cup): For that intense chocolate flavor! Use good quality cocoa to ensure rich and decadent brownie goodness.
-
Butter, melted (1/2 cup): Butter brings moisture and richness. The melted butter helps to create that perfect melt-in-your-mouth texture.
-
Large Eggs (2): They bind everything together and help create that fabulous fudgy consistency. Room temperature eggs mix in more smoothly, so maybe take them out of the fridge a little earlier!
-
Vanilla Extract (1 teaspoon): A splash of vanilla brightens up the flavor. It’s like a warm hug for your brownies – comforting and elevating all at once.
-
All-Purpose Flour (1/2 cup): This will give your brownies structure. But remember, don’t overmix after adding the flour, or you’ll end up with a dense brownie.
-
Salt (1/4 teaspoon): Just a pinch! Salt enhances all the flavors and balances the sweetness.
-
Chocolate Chips (1 cup, optional): Go wild if you want! These can be semi-sweet or dark chocolate chips, or even peanut butter chips if you’re feeling adventurous.
Preparing Tasty Sourdough Discard Brownies
-
Preheat the oven: Start by preheating your oven to 350°F (175°C). Grease a baking pan (9×9 inches fits nicely!) to ensure those brownies don’t stick.
-
Mix the base: In a large mixing bowl, combine your sourdough starter, sugar, cocoa powder, and melted butter. This is where you get to mix it all up until well combined. Let those ingredients mingle!
-
In go the eggs and vanilla: Next, add in your eggs and the vanilla extract. Stir until it’s all blended nicely. You want that luscious chocolate mix to shine!
-
Add flour and salt: Gradually fold in flour and salt. Remember, just mix until everything comes together. Those flour pockets should disappear, so it’s a gentle stir here!
-
Chocolate chips, if you dare: If you decided to go for the chocolate chips, fold them in now. They’re like little surprises in every bite!
-
Pour and spread: Transfer the batter into your greased baking pan and spread it out evenly. Get in there; it’s therapeutic!
-
Bake to perfection: Slide your pan into the oven and bake for about 25-30 minutes. A toothpick inserted in the center should come out with a few moist crumbs, but not wet batter.
-
Cool and serve: Let the brownies cool a bit in the pan before cutting them into squares. Patience is a virtue, after all.
Best way to enjoy it
These brownies are delightful when served warm – they’ll be soft and melty, practically begging for a scoop of vanilla ice cream on top. You could even drizzle some caramel or chocolate sauce over them if you’re feeling fancy. For a casual gathering, just plate them up with a light dusting of powdered sugar and a few berries for a pop of color.
How to store and freeze
If you’ve got leftovers (which I highly doubt, but let’s play pretend!), store your brownies in an airtight container at room temperature for 3-4 days. They may even taste better on day two as the flavors meld together! If you want to keep them longer, wrap them tightly in plastic wrap and then foil, or pop them in a freezer-safe bag. They can live in the freezer for up to three months. Just thaw them at room temperature before indulging.
Helpful cooking tips
-
Room temperature ingredients: It’s always best to have your ingredients at room temperature.
-
Don’t overmix: Overmixing flour can lead to tough brownies. Mix until just combined for that beautiful fudgy texture.
-
Experiment: Try swapping out some of the all-purpose flour for almond flour for a nutty twist, or even add a sprinkle of espresso powder alongside the cocoa for a mocha flavor.
-
Decadent add-ins: Get creative! Consider adding nuts, caramel swirls, or even a touch of sea salt on top before baking for a gourmet touch.
Creative Twists
Have some fun with the flavors! Try adding orange zest for a citrusy zing or swapping out half the cocoa powder for matcha for a green twist on a classic. If you’re a coconut lover, toast some coconut flakes and fold them into the batter.
Ingredients list
- 1 cup sourdough starter (discard)
- 1 cup sugar
- 1/2 cup unsweetened cocoa powder
- 1/2 cup butter, melted
- 2 large eggs
- 1 teaspoon vanilla extract
- 1/2 cup all-purpose flour
- 1/4 teaspoon salt
- 1 cup chocolate chips (optional)
Directions to follow
- Preheat the oven to 350°F (175°C) and grease a 9×9 inch baking pan.
- Combine sourdough starter, sugar, cocoa powder, and melted butter in a mixing bowl.
- Add eggs and vanilla, mixing until blended.
- Gradually add flour and salt, stirring until just incorporated.
- Fold in chocolate chips if using.
- Pour the batter into the prepared pan and spread evenly.
- Bake for 25-30 minutes, until a toothpick comes out with a few moist crumbs.
- Let cool before cutting into squares.
Your questions answered
- Can I use active sourdough starter? – Absolutely! Just adjust the sugar slightly if it’s sweetened naturally.
- What’s the best way to cut brownies? – Use a sharp knife; for cleaner cuts, you can warm the knife slightly.
- How can I make these gluten-free? – You can substitute the all-purpose flour with a 1:1 gluten-free baking flour.
- What’s the prep time for this recipe? – It’s about 10-15 minutes of prep time – super quick!
- Can I add nuts? – Yes! Chopped nuts like walnuts or pecans would add a lovely crunch.
It’s about time you treat yourself to these brownies. Not only are they an excellent way to make use of that sourdough starter, but they’re also a decadent indulgence that feels good to share (or not!). So preheat that oven and dive into this adventure; I can’t wait to hear what you think! Let’s share our culinary journeys in the comments!

Tasty Sourdough Discard Brownies
Description
Transform sourdough discard into these delightful brownies that are rich, fudgy, and perfectly chocolatey. Perfect for sharing with loved ones!Ingredients
Main Ingredients
Instructions
Baking the Brownies
-
Preheat the oven
Preheat your oven to 350°F (175°C) and grease a 9×9 inch baking pan. -
Mix the base
Combine sourdough starter, sugar, cocoa powder, and melted butter in a mixing bowl. -
Add eggs and vanilla
Add in your eggs and vanilla extract. Stir until blended. -
Fold in flour and salt
Gradually fold in flour and salt until just combined.Do not overmix. -
Add chocolate chips
Fold in chocolate chips if using. -
Bake
Pour the batter into the prepared pan and bake for 25-30 minutes.A toothpick should come out with a few moist crumbs. -
Cool and serve
Allow the brownies to cool before cutting into squares.
Nutrition Facts
Servings 16
- Amount Per Serving
- Calories 200kcal
- % Daily Value *
- Total Fat 10g16%
- Saturated Fat 6g30%
- Trans Fat 0g
- Cholesterol 50mg17%
- Sodium 100mg5%
- Potassium 150mg5%
- Total Carbohydrate 30g10%
- Dietary Fiber 2g8%
- Sugars 20g
- Protein 3g6%
- Vitamin A 300 IU
- Vitamin C 0 mg
- Calcium 20 mg
- Iron 1.5 mg
- Vitamin D 0 IU
- Vitamin E 1 IU
- Vitamin K 0 mcg
- Thiamin 0 mg
- Riboflavin 0.1 mg
- Niacin 0.4 mg
- Vitamin B6 0.1 mg
- Folate 15 mcg
- Vitamin B12 0 mcg
- Biotin 0 mcg
- Pantothenic Acid 0.2 mg
- Phosphorus 50 mg
- Iodine 0 mcg
- Magnesium 10 mg
- Zinc 0.5 mg
- Selenium 1 mcg
- Copper 0.2 mg
- Manganese 0.3 mg
- Chromium 0 mcg
- Molybdenum 0 mcg
- Chloride 0 mg
* Percent Daily Values are based on a 2,000 calorie diet. Your daily value may be higher or lower depending on your calorie needs.