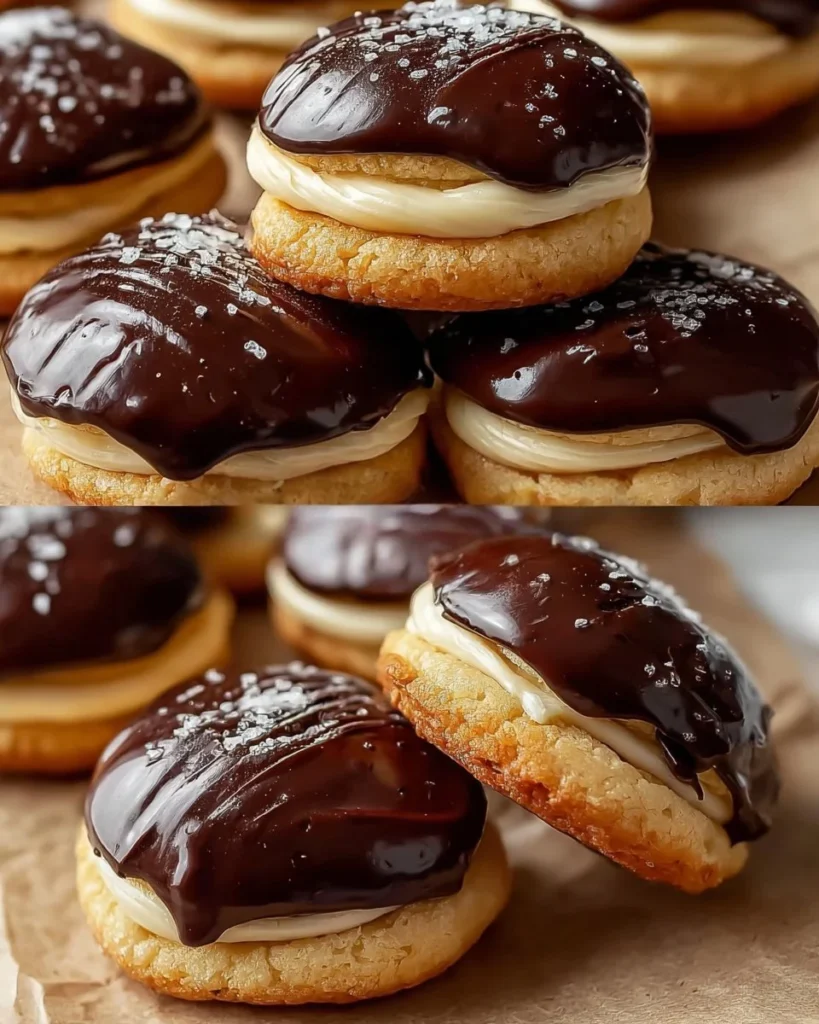
Ah, Boston Cream Pie Cookies! These delightful little treats are the perfect fusion of two beloved desserts—Boston cream pie and cookies. Picture this: a soft, chewy cookie that’s filled with velvety pastry cream and drizzled with a rich chocolate ganache. It’s essentially a two-for-one deal that’s sure to impress at any gathering or simply satisfy your own sweet tooth on a cozy Saturday afternoon. Now, let me share my secrets to making these exquisite confections, as well as why you’ll want them in your life.
Why you’ll love this recipe
Imagine biting into a cookie that offers not just the warmth of freshly baked dough, but also the creaminess of pastry cream and the decadent allure of chocolate. It’s like a hug for your tastebuds! These cookies are beautifully balanced, featuring a rich chocolate flavor complemented by the sweet, creamy filling.
They’re not just delicious; they’re also incredibly fun to make! There’s something satisfying about layering flavors and creating that perfect little sandwich of cookie goodness. Plus, they can be a fantastic conversation starter when you serve them at your next gathering. With their casual yet elegant flair, Boston Cream Pie Cookies bring that classic dessert experience into an easy-to-eat format. Whether you’re baking for a special occasion or simply trying to impress your family, this recipe won’t steer you wrong.
Gather these ingredients
Let’s set the stage! Having the right ingredients will make your baking adventure not just easy, but truly enjoyable.
-
1 cup all-purpose flour: This is the backbone of our cookies—providing structure and chewiness. If you’re looking for a gluten-free option, you can substitute with a 1:1 gluten-free blend.
-
1/2 cup sugar: Sweetness is key, of course! Granulated sugar gives that delightful sweetness and slight crispness around the cookie edges. For a slightly deeper flavor, consider using brown sugar.
-
1/4 cup unsweetened cocoa powder: It’s the starring character here—imbuing our cookies with that chocolatey richness. Use high-quality cocoa for the best results; it makes all the difference.
-
1/2 teaspoon baking powder: This little agent of leavening is essential to ensure a nice rise. Don’t skip it, or you’ll end up with flat cookies!
-
1/4 teaspoon salt: A pinch of salt helps elevate all the flavors. It’s like a gentle whisper reminding you that there’s more to this cookie than just sweetness.
-
1/2 cup unsalted butter, softened: Butter adds a luscious, creamy texture. Make sure it’s softened to room temperature for easy creaming. If you need a dairy-free alternative, coconut oil can work wonders!
-
1 large egg: The egg acts as a binder, bringing everything together. It also adds moisture and richness.
-
1 teaspoon vanilla extract: It’s the magic touch for an aromatic flavor that makes cookies so irresistible. Fresh vanilla is ideal, but pure extract will do nicely.
-
1/2 cup pastry cream (or vanilla pudding): This is where the magic really happens! You can whip up a quick pastry cream or use store-bought vanilla pudding—either will create that delightful creamy filling.
-
1 cup chocolate ganache: This crowning glory is simply melted chocolate mixed with cream. You can use semisweet, dark, or even white chocolate depending on your preference!
The cooking process explained
Now, let’s roll up our sleeves and dive into the fun part—making these delightful cookies!
-
Preheat your oven: Set it to 350°F (175°C) for perfectly baked cookies.
-
Mix the dry ingredients: In a bowl, whisk together the flour, sugar, cocoa powder, baking powder, and salt. This ensures an even distribution of flavors and leavening.
-
Cream the butter and sugar: In another bowl, beat the softened butter with the sugar until creamy and light. It should look fluffy—like a cloud!
-
Add the egg and vanilla: Crack in the egg and pour in the vanilla extract. Mix until everything is combined and smooth.
-
Combine the mixtures: Gradually add the dry ingredients to the wet, mixing until just combined. Be careful not to overmix; your cookies will thank you!
-
Scoop the dough: Using a teaspoon or cookie scoop, drop spoonfuls of dough onto a parchment-lined baking sheet, leaving space between each for spreading.
-
Bake: Slide them into the oven and bake for 10-12 minutes. They’ll puff up and develop that alluring crackly surface. Let them cool completely on a wire rack afterward.
-
Fill with pastry cream: Once the cookies are cool, pipe or spoon a generous dollop of pastry cream onto half of the cookies.
-
Sandwich the cookies: Top each cream-filled cookie with another one to create delightful little sandwiches.
-
Make the ganache: Melt chocolate chips with cream—1:1 ratio works best—then drizzle it over your cookie sandwiches once cooled. Let it set.
Best way to enjoy it
Now for the best part—serving these little masterpieces! You can present them beautifully on a cake stand for a stunning display or arrange them on a platter for easy grabbing at parties.
Pair them with a dollop of whipped cream and some fresh berries to add a pop of color and extra flavor. A scoop of vanilla ice cream on the side? Yes, please! These cookies are delightful on their own but can be elevated with a bit of creativity.
Storage and reheating tips
So, what about leftovers? If you’re lucky enough to have some (or plan to make them ahead), store your cookies in an airtight container in the fridge—they’ll last about 3–4 days. If you want to freeze them, layer between parchment paper in a freezer-safe container, and they’ll be good for up to a month.
When you’re ready to enjoy, just let them thaw on the counter. You can even pop them in the microwave for a few seconds if you want that warm, gooey goodness.
Extra tips and advice
I’ve got some pro tips to ensure your baking experience is smooth sailing!
-
When measuring flour, spoon it into the cup and level it off for accuracy. Don’t scoop directly from the bag; it packs the flour and can make your cookies too dense.
-
Be patient with the ganache—allow it to cool slightly before drizzling. This way, it won’t just slide off completely but cling beautifully to your cookies.
-
Feel free to taste as you go! Just remember to keep that spoon away from the cookie dough if you still want enough leftovers to share!
Creative Twists
Want to switch things up? Here are some variations to keep things fresh:
-
Nutty Addition: Fold in some chopped nuts like almonds or hazelnuts into the dough for a crunchy twist.
-
Flavored Ganache: Experiment by adding a splash of espresso, peppermint extract, or even orange zest to your ganache for an exciting flavor boost.
-
S’mores Version: Swap out the chocolate ganache for melted marshmallows for a s’mores-inspired take, complete with graham cracker crumbs on top!
Ingredients
- 1 cup all-purpose flour
- 1/2 cup sugar
- 1/4 cup unsweetened cocoa powder
- 1/2 teaspoon baking powder
- 1/4 teaspoon salt
- 1/2 cup unsalted butter, softened
- 1 large egg
- 1 teaspoon vanilla extract
- 1/2 cup pastry cream (or vanilla pudding)
- 1 cup chocolate ganache (chocolate chips and cream mixed)
Step-by-step instructions
- Preheat your oven to 350°F (175°C).
- Combine flour, sugar, cocoa powder, baking powder, and salt in a bowl.
- Cream butter and sugar until light and fluffy; add egg and vanilla, mixing until smooth.
- Gradually stir in dry ingredients until combined.
- Drop spoonfuls of dough onto parchment-lined baking sheets.
- Bake for 10-12 minutes; cool completely.
- Pipe or spoon pastry cream onto half of the cookies and sandwich with the other half.
- Make ganache by melting chocolate chips with cream; drizzle over cookie sandwiches.
- Allow ganache to set before enjoying!
Your questions answered
- Can I use gluten-free flour? Absolutely! Just make sure to use a good blend designed for baking.
- How do I store leftovers? Keep them in an airtight container in the fridge for 3–4 days, or freeze for up to a month.
- What if I don’t have pastry cream? You can easily substitute with store-bought vanilla pudding—just as tasty!
- Can I make these ahead of time? For sure! Just assemble them the day you plan to serve for the freshest experience.
- Do they have to be refrigerated? While not necessary, refrigeration can prolong freshness, especially with the cream filling.
As we wrap this up, I hope you feel inspired to get into the kitchen and whip up these Boston Cream Pie Cookies. They are a treat that can bring joy to any day and serve as a sweet surprise for family and friends alike. So, roll those sleeves up, line that baking sheet, and start mixing! And remember, share your experiences in the comments; I can’t wait to hear how yours turned out!
Use Your Leftovers
Reduce food waste by making these recipes with your leftover ingredients:


Boston Cream Pie Cookies
Description
These Boston Cream Pie Cookies are soft, chewy cookies filled with velvety pastry cream and drizzled with rich chocolate ganache. A perfect treat for gatherings or a cozy afternoon.Ingredients
Dry Ingredients
Wet Ingredients
Filling and Topping
Instructions
Baking the Cookies
-
Preheat Oven
Set the oven to 350°F (175°C). -
Mix Dry Ingredients
In a bowl, whisk together flour, sugar, cocoa powder, baking powder, and salt. -
Cream Butter and Sugar
Beat softened butter with sugar until creamy and light. -
Add Egg and Vanilla
Mix in the egg and vanilla until smooth. -
Combine Mixtures
Gradually add dry ingredients to wet, mixing until just combined.Avoid overmixing. -
Scoop and Bake
Drop spoonfuls of dough onto a parchment-lined baking sheet and bake for 10-12 minutes.Let cool on a wire rack.
Assembling Cookies
-
Fill with Pastry Cream
Once cool, pipe or spoon pastry cream onto half of the cookies and sandwich with the other half. -
Make Ganache
Melt chocolate chips with cream for ganache; drizzle over cookies.Let ganache set before serving.
Nutrition Facts
Servings 12
- Amount Per Serving
- Calories 150kcal
- % Daily Value *
- Total Fat 8g13%
- Saturated Fat 5g25%
- Trans Fat 0g
- Cholesterol 30mg10%
- Sodium 100mg5%
- Potassium 80mg3%
- Total Carbohydrate 20g7%
- Dietary Fiber 1g4%
- Sugars 12g
- Protein 2g4%
- Vitamin A 300 IU
- Vitamin C 0 mg
- Calcium 30 mg
- Iron 1 mg
- Vitamin D 0 IU
- Vitamin E 0 IU
- Vitamin K 0 mcg
- Thiamin 0 mg
- Riboflavin 0.1 mg
- Niacin 0.5 mg
- Vitamin B6 0 mg
- Folate 1 mcg
- Vitamin B12 0 mcg
- Biotin 0 mcg
- Pantothenic Acid 0 mg
- Phosphorus 50 mg
- Iodine 0 mcg
- Magnesium 10 mg
- Zinc 0.5 mg
- Selenium 1 mcg
- Copper 0.1 mg
- Manganese 0.2 mg
- Chromium 0 mcg
- Molybdenum 0 mcg
- Chloride 0 mg
* Percent Daily Values are based on a 2,000 calorie diet. Your daily value may be higher or lower depending on your calorie needs.