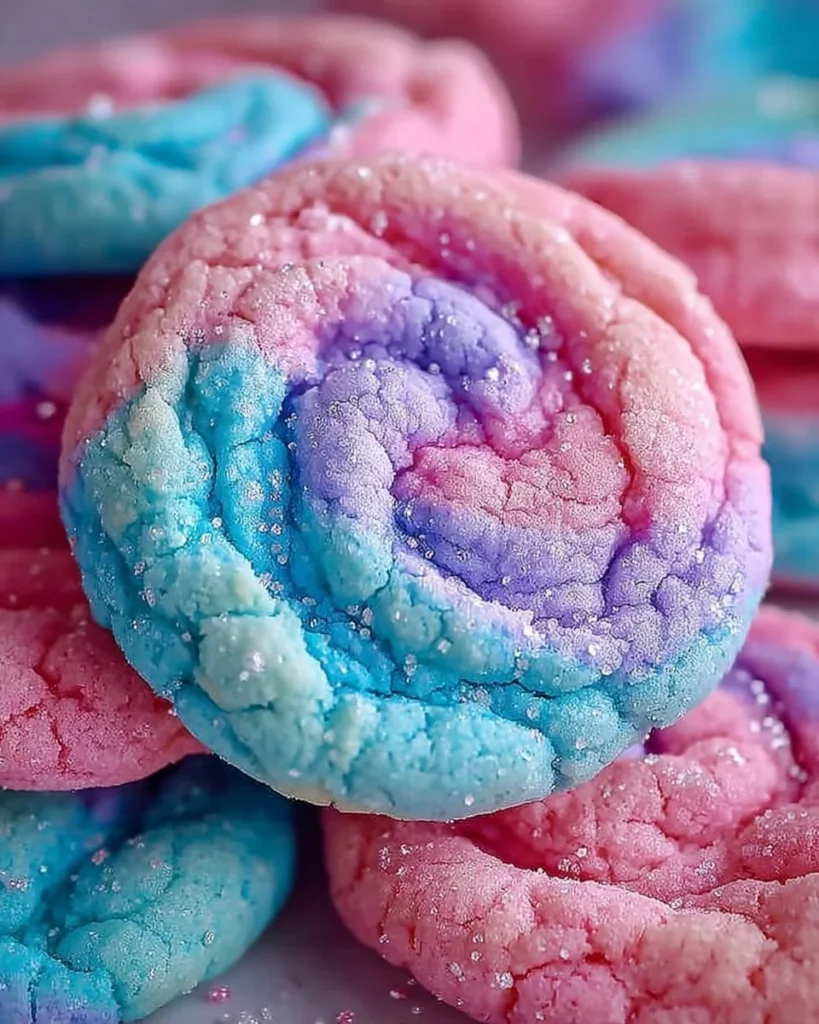
Ah, let me tell you about my latest obsession—Cotton Candy Cookies! They’re not just cookies; they’re whimsical little bites of nostalgia that take me back to summer fairs and childhood adventures. You remember those fluffy, melt-in-your-mouth spirals of sugary delight, right? I thought, why not capture that innocence and sweetness in a cookie? This recipe is as vibrant and fun as a carnival! Perfect for parties, picnics, or just a cozy night in, these cookies will delight both kids and adults alike. So, let's roll up our sleeves and get baking!
Why you'll love this recipe
Imagine biting into a cookie that bursts with colors reminiscent of rainbow cotton candy—soft, chewy, and just the right balance of sweetness. This recipe isn’t just about satisfying a sweet tooth; it’s about indulging in a memory, a slice of joy, and a sprinkle of childhood nostalgia. Plus, who doesn’t love a colorful dessert that lights up the table and your mood?
These cookies are much more than a pretty face. They’re incredibly easy to whip up with ingredients you probably already have on hand. The unique combination of flavors—from the classic buttery base to a hint of cotton candy magic—makes these cookies irresistible. And the best part? You have creative freedom! Feel free to play with colors and flavors. So, let’s make some magic happen in the kitchen tonight!
Gather these ingredients
Let’s talk about what you'll need. Getting this lineup together is half the fun—trust me!
- 2 1/2 cups all-purpose flour: This is the backbone of your cookies. Use a spoon to scoot it into the measuring cup and level it off for the most accurate measurement.
- 1 cup granulated sugar: The sweet star of the show. It brings that delightful sugary crunch!
- 1/2 teaspoon baking powder: This helps the cookies rise slightly, ensuring they are soft and fluffy.
- 1/4 teaspoon baking soda: Just a pinch of this secret ingredient keeps the texture light!
- 1/4 teaspoon salt: A tiny dash elevates sweetness.
- 1/2 cup unsalted butter, softened: Here’s where the magic begins. Soften your butter to room temperature so it creams perfectly with the sugar.
- 1/4 cup buttermilk: If you don’t have buttermilk on hand, a quick mix of regular milk and a splash of lemon juice works wonders!
- 1 large egg: This binds everything together, making your cookies cohesive and delicious.
- 1 teaspoon vanilla extract: A crucial aromatic that brings depth and warmth to your flavor profile.
- Gel food coloring (pink and blue): You’ll want to create that cotton candy appearance, and gel is great for vibrant hues without thinning out the dough.
- Cotton candy flavoring (optional): This is the cherry on top for those nostalgic vibes. You can find this at specialty baking stores or online.
The cooking process explained
Ready to bring those cookies to life? Here’s how we do it step by step—easy peasy!
- Preheat the Oven: Get your oven nice and toasty at 350°F (175°C). It’s crucial for perfectly baked cookies!
- Mix the Dry Ingredients: In a bowl, combine the flour, baking powder, baking soda, and salt. Whisk it together like a champ—this helps everything blend evenly.
- Cream Butter and Sugar: In a large bowl, cream the softened butter and granulated sugar using a hand mixer or a stand mixer. You want this to be fluffy and pale—about 3 minutes. Don’t rush; good things take time!
- Add the Wet Ingredients: Beat in the egg, vanilla, and buttermilk until combined. This is your magical liquid that makes everything blend beautifully.
- Combine Dry and Wet Ingredients: Gradually mix your dry mixture into wet ingredients until just combined. Be gentle; overmixing can lead to dense cookies—no one wants that!
- Divide and Color the Dough: Split the dough into two equal portions. In one, add a few drops of pink gel food coloring, and in the other, a bit of blue. Have fun with it! Use your hands to mix the colors in until you achieve your desired shades.
- Form the Cotton Candy Cookies: Using a scoop or your hands, take small amounts of dough from each color and press them together, forming vibrant little balls. Place them on a lined baking sheet, leaving space for them to spread.
- Bake: Slide those beauties into the oven and bake for about 10-12 minutes. You want the edges to be slightly golden but the centers to look a tad undercooked—the residual heat will work magic!
- Cool and Serve: Allow your cookies to cool on the baking sheet for a few minutes before transferring them to a wire rack. This helps them firm up without becoming too hard.
Best way to enjoy it
Now that you have these colorful little gems, how do you serve them? Honestly, they are delightful warm, straight off the baking sheet, perhaps with a glass of cold milk or a cup of tea. For an added touch, consider a scoop of vanilla ice cream sandwiched between two cookies—epic, right?
You may even want to set up a cookie decorating station for a fun twist. Have sprinkles on hand or perhaps drizzle some melted chocolate over the top for that extra flair. The magic is in your hands!
Storage and reheating tips
If you somehow have leftovers (though I highly doubt that!), store your cookies in an airtight container at room temperature for up to a week. To keep them extra soft, you can toss a piece of bread inside—this tip really works!
If you want to freeze them, lay the cookies on a baking sheet to flash freeze them first, then transfer them to a zip-top bag. When you’re ready for a sweet fix, just thaw them at room temperature for about 30 minutes—maybe give them a quick 5-second spin in the microwave to freshen them up, but don’t overdo it!
Helpful cooking tips
- Butter: If you forget to take your butter out ahead of time, pop it in the microwave for 10 seconds at a time—don’t let it melt!
- Coloring: When adding your gel food coloring, start with a drop at a time. You can always add more, but you can’t take it out!
- Cotton Candy Flavoring: If you want to ensure that burst of flavor, consider adding just a few drops at a time to avoid overwhelming the natural sweetness of the cookies. A little goes a long way!
Creative Twists
Feeling adventurous? There are plenty of ways to give your Cotton Candy Cookies a twist! Try:
- Different Flavors: Swap out the cotton candy flavoring for bubblegum, strawberry, or even watermelon extracts.
- Toppings: Drizzle white chocolate over the finished cookies, or press mini marshmallows into the tops before baking.
- Add-Ins: Mix in sprinkles for an extra festive touch or mini chocolate chips for a sweet contrast!
Your questions answered
- How much time do I need? Plan for about 1 hour from start to finish, including prep and baking time. Keep an eye on those cookies!
- Can I use a gluten-free flour? Absolutely! Just ensure you use a cup-for-cup gluten-free flour substitute.
- What’s the best way to pair these cookies? They’re delightful on their own, but serve them with fresh fruit or a fruity punch for a colorful dessert table.
- Can I double the recipe? Yes, but watch your mixer. It may need a little more time to get the butter and sugar fluffy!
- Substitute for buttermilk? Yes! Mix regular milk with a teaspoon of vinegar or lemon juice and let it sit for a few minutes.
Baking, my friend, is an art form, and you’re the artist!
These Cotton Candy Cookies are not just treats; they are experiences teeming with childhood nostalgia and playful flavors. So don your apron, roll up those sleeves, and dive into this delightful recipe! Whether you whip them up solo or with kids, the experience will be just as sweet as the cookies themselves. I can't wait for you to try this out! Please share your thoughts, tweaks, or any vibrant cookie stories in the comments below—we’re all in this delicious adventure together! Happy baking!