Ah, creamy baked mac and cheese! It’s more than just a dish; it’s a warm hug on a chilly evening, a nostalgic taste of childhood, and always a crowd-pleaser. I can’t count how many times I’ve walked into my kitchen, exhausted after a long day, and just wanted something comforting, hearty, and delicious. Mac and cheese has a way of transforming even the dullest of days into something special. And trust me, once you’ve tasted this version, you won’t want to go back to the boxed stuff.
Why you’ll love this recipe
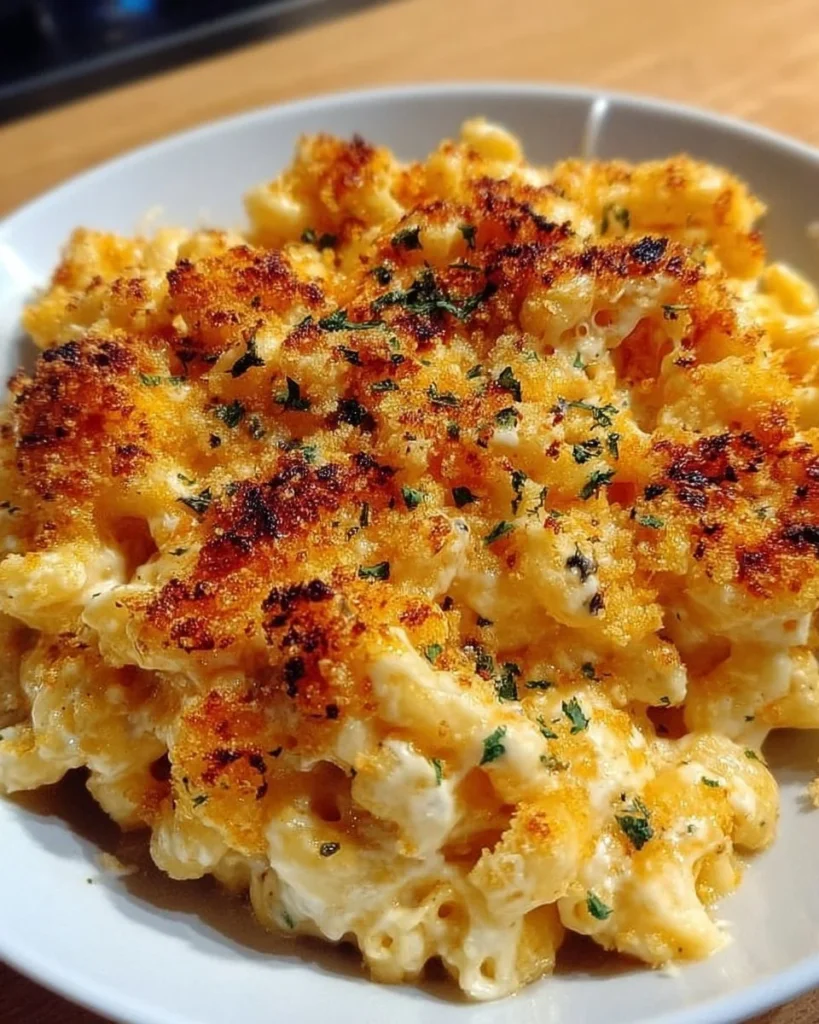
Let’s talk about what makes this creamy baked mac and cheese a standout. It’s all about layers—layers of flavor, layers of texture, and layers of cheesy goodness. Picture this: a rich, velvety cheese sauce hugging every piece of al dente elbow macaroni, topped with a crunchy, buttery panko crust that adds an addictive crunch. You’re not just cooking; you’re creating magic in your kitchen!
Plus, this dish is unbelievably versatile. Want a touch of spice? Toss in some diced jalapeños! Looking for something a bit more gourmet? Drizzle some truffle oil before serving! Whether you’re hosting a dinner party or simply indulging in a cozy night in, creamy baked mac and cheese delivers every time.
Key ingredients overview
Let’s round up the heroes of this comfort food saga.
-
Elbow macaroni (16 ounces): These little nuggets are perfect for catching the sauce in all their crevices. You can use other pasta shapes too if you’re feeling adventurous!
-
Unsalted butter (4 tablespoons): It’s essential for that rich flavor base and perfect texture in your cheese sauce. Salted butter can work in a pinch, but we want to manage our sodium levels here.
-
All-purpose flour (1/4 cup): This is your thickening agent, transforming that simple butter into a roux.
-
Milk (3 cups): I prefer whole milk for creaminess, but 2% will do just fine. You could even substitute some with half-and-half if you’re feeling extra indulgent!
-
Cheddar cheese (2 cups, shredded): Sharp cheddar gives that iconic flavor. Feel free to mix it with mild cheddar if you want a mellower taste.
-
Mozzarella cheese (1 cup, shredded): It brings that ooey-gooey, stretchy quality we all crave!
-
Parmesan cheese (1/2 cup, grated): This cheese injects a depth of flavor and a hint of nuttiness.
-
Spices (garlic powder, onion powder, mustard powder): They’re the unsung heroes that elevate the dish. They’ll dance on your taste buds!
-
Panko breadcrumbs (1/2 cup): These little crunchy gems are the secret to a fabulous topping. Their light texture adds the perfect crunch!
-
Fresh parsley (for garnish): Always a nice touch to brighten up the dish!
The cooking process explained
Ready to make mac and cheese magic? Here’s how it goes down!
-
Preheat your oven to 350°F (175°C). Make sure your trusty 9×13-inch baking dish is greased and ready to go. This is key for a clean exit from the oven!
-
Cook the elbow macaroni according to package instructions until al dente. We want a bit of bite because it will continue to cook in the oven. Drain it and set it aside.
-
Melt the butter in a large saucepan over medium heat. Watch it closely—it shouldn’t brown!
-
Whisk in the flour, creating a paste (or roux). Cook for about 1 minute for that nutty aroma to develop.
-
Pour in the milk slowly, whisking constantly until the mixture becomes smooth and thickens—about 3-5 minutes. This is the magic moment!
-
Reduce the heat to low and add your cheese! Stir until it’s all melted and incorporated. This is where the real flavor starts to shine.
-
Season the sauce with garlic powder, onion powder, mustard powder, salt, and pepper. Taste and adjust it to your liking; seasoning is crucial!
-
Combine the cooked macaroni with the cheese sauce until every piece is coated. Talk about indulgence!
-
Spread the macaroni and cheese mixture into your greased baking dish. Equal distribution makes for even cooking!
-
In a small bowl, mix the panko breadcrumbs with the melted butter and sprinkle it generously over the top. This makes that top layer perfectly crisp!
-
Bake in the oven for 25-30 minutes, or until the top is gloriously golden brown and bubbling. You’ll know it’s ready when the scents start wafting through the house!
-
Remove it from the oven and let it cool for a few minutes. A sprinkle of chopped fresh parsley adds a beautiful pop of color before serving!
Best way to enjoy it
Serve this creamy baked mac and cheese piping hot, straight from the oven. It’s great on its own but pairs wonderfully with a light salad or some roasted veggies to balance out the indulgent richness. Want to jazz it up? Consider adding crispy bacon bits or sautéed mushrooms right into the mix for added flavor textures. A sprinkle of chili flakes can also give it that extra kick!
Storage and reheating tips
After enjoying your cheesy goodness, you might find yourself with some leftovers (if you’re lucky!). Allow the mac and cheese to cool completely, then transfer it to an airtight container to keep it fresh in the fridge for up to 3 days. You can also freeze it! Just pack it in a freezer-safe dish. When you’re ready to dig in again, simply thaw in the fridge overnight and reheat in the oven (at 350°F) until heated through. A splash of milk while reheating helps to revive that creamy texture!
Pro chef tips
-
Toast your spices in the melted butter for a minute before adding the flour. Trust me, it enhances their flavor beautifully!
-
If you prefer a cheesier experience, bump up the amount of cheese! The more, the merrier, right?
-
Mix different cheese varieties for depth. Think gouda for smokiness or fontina for extra creaminess!
-
Remember, the higher the quality of cheese, the better the taste. Treat yourself!
Creative Twists
Feeling adventurous? Here are some playful variations:
-
Truffle Oil Mac and Cheese: Drizzle a bit of truffle oil before serving to elevate the flavor.
-
Buffalo Chicken Mac: Stir in shredded cooked chicken and buffalo sauce for a spicy, tangy kick.
-
Vegetable Lover’s Mac: Toss steamed broccoli or peas into the mix before baking for a nutrient boost.
-
Tex-Mex Style: Add black beans, corn, and diced tomatoes with some taco seasoning for a twist on flavor!
Ingredients
- 16 ounces elbow macaroni
- 4 tablespoons unsalted butter
- 1/4 cup all-purpose flour
- 3 cups milk (whole or 2%)
- 2 cups shredded sharp cheddar cheese
- 1 cup shredded mozzarella cheese
- 1/2 cup grated Parmesan cheese
- 1 teaspoon garlic powder
- 1/2 teaspoon onion powder
- 1/2 teaspoon mustard powder
- Salt and pepper to taste
- 1/2 cup panko breadcrumbs
- 1 tablespoon melted butter
- Fresh parsley, chopped (for garnish)
Directions to follow
- Preheat your oven to 350°F (175°C) and grease your baking dish.
- Cook the macaroni according to the package instructions until al dente; drain and set aside.
- Melt the butter in a large saucepan over medium heat.
- Whisk in the flour for about 1 minute.
- Slowly pour in the milk, whisking until smooth and thick—3-5 minutes.
- Reduce heat, add cheeses, and stir until melted.
- Season with garlic powder, onion powder, mustard powder, salt, and pepper.
- Combine cooked macaroni with the cheese sauce.
- Spread the mixture evenly in the baking dish.
- Mix panko breadcrumbs with melted butter; sprinkle over the top.
- Bake for 25-30 minutes until golden and bubbly.
- Let cool briefly and garnish with parsley before serving.
Your questions answered
-
Can I use gluten-free pasta? Absolutely! Gluten-free elbow pasta works perfectly here.
-
How do I make it vegetarian? All the ingredients are already vegetarian-friendly, but you can always add more veggies!
-
Can I prep this ahead? Yes! Prepare the mac and cheese and store it in the fridge for up to 2 days before baking.
-
What’s the best way to reheat? Bake it at 350°F with a splash of milk to revive the creaminess!
-
How about adding proteins? Cooked chicken, bacon, or even veggies work fabulously mixed into the base!
Feel free to tweak this creamy baked mac and cheese to your liking—it’s all about making it your own! This dish is a wonderful canvas for your culinary creativity. Dive into it, enjoy every cheesy bite, and don’t hesitate to share your thoughts or variations with our vibrant cooking community! Happy cooking!

Creamy Baked Mac and Cheese
Description
This creamy baked mac and cheese is a delightful combination of rich cheese sauce and a crispy panko crust, perfect for any occasion.Key Ingredients for Creamy Baked Mac and Cheese
Main Ingredients
Baking Instructions
Cooking Steps
-
Preheat Oven
Preheat your oven to 350°F (175°C) and grease your baking dish. -
Cook Macaroni
Cook the elbow macaroni according to the package instructions until al dente; drain and set aside. -
Prepare Cheese Sauce
Melt the butter in a large saucepan over medium heat. Whisk in the flour for about 1 minute. -
Add Milk
Slowly pour in the milk, whisking until smooth and thick—3-5 minutes. -
Incorporate Cheese
Reduce heat, add cheeses, and stir until melted. -
Season Sauce
Season with garlic powder, onion powder, mustard powder, salt, and pepper. -
Combine Pasta and Sauce
Combine cooked macaroni with the cheese sauce. -
Prepare for Baking
Spread the mixture evenly in the baking dish. -
Prepare Topping
Mix panko breadcrumbs with melted butter; sprinkle over the top. -
Bake
Bake for 25-30 minutes until golden and bubbly. -
Cool and Garnish
Let cool briefly and garnish with parsley before serving.
Nutrition Facts
Servings 6
- Amount Per Serving
- Calories 500kcal
- % Daily Value *
- Total Fat 33g51%
- Saturated Fat 20g100%
- Trans Fat 1g
- Cholesterol 80mg27%
- Sodium 600mg25%
- Potassium 400mg12%
- Total Carbohydrate 40g14%
- Dietary Fiber 2g8%
- Sugars 4g
- Protein 20g40%
- Vitamin A 600 IU
- Vitamin C 0 mg
- Calcium 600 mg
- Iron 2 mg
- Vitamin D 0 IU
- Vitamin E 0 IU
- Vitamin K 0 mcg
- Thiamin 0 mg
- Riboflavin 0 mg
- Niacin 0 mg
- Vitamin B6 0 mg
- Folate 0 mcg
- Vitamin B12 1 mcg
- Biotin 0 mcg
- Pantothenic Acid 0 mg
- Phosphorus 400 mg
- Iodine 0 mcg
- Magnesium 0 mg
- Zinc 2 mg
- Selenium 0 mcg
- Copper 0 mg
- Manganese 0 mg
- Chromium 0 mcg
- Molybdenum 0 mcg
- Chloride 0 mg
* Percent Daily Values are based on a 2,000 calorie diet. Your daily value may be higher or lower depending on your calorie needs.